HMS Queen Elizabeth - Aircraft Carrier - Part 3: transfers and flight deck
I've read many times that small scale aircraft carrier models stand or fall by their flight deck markings. I guess the decals included in the Mountford kit (as the kit itself) must have been based on early renderings because they bear little resemblance to the markings seen in photos of HMS Queen Elizabeth during Westlant 19.
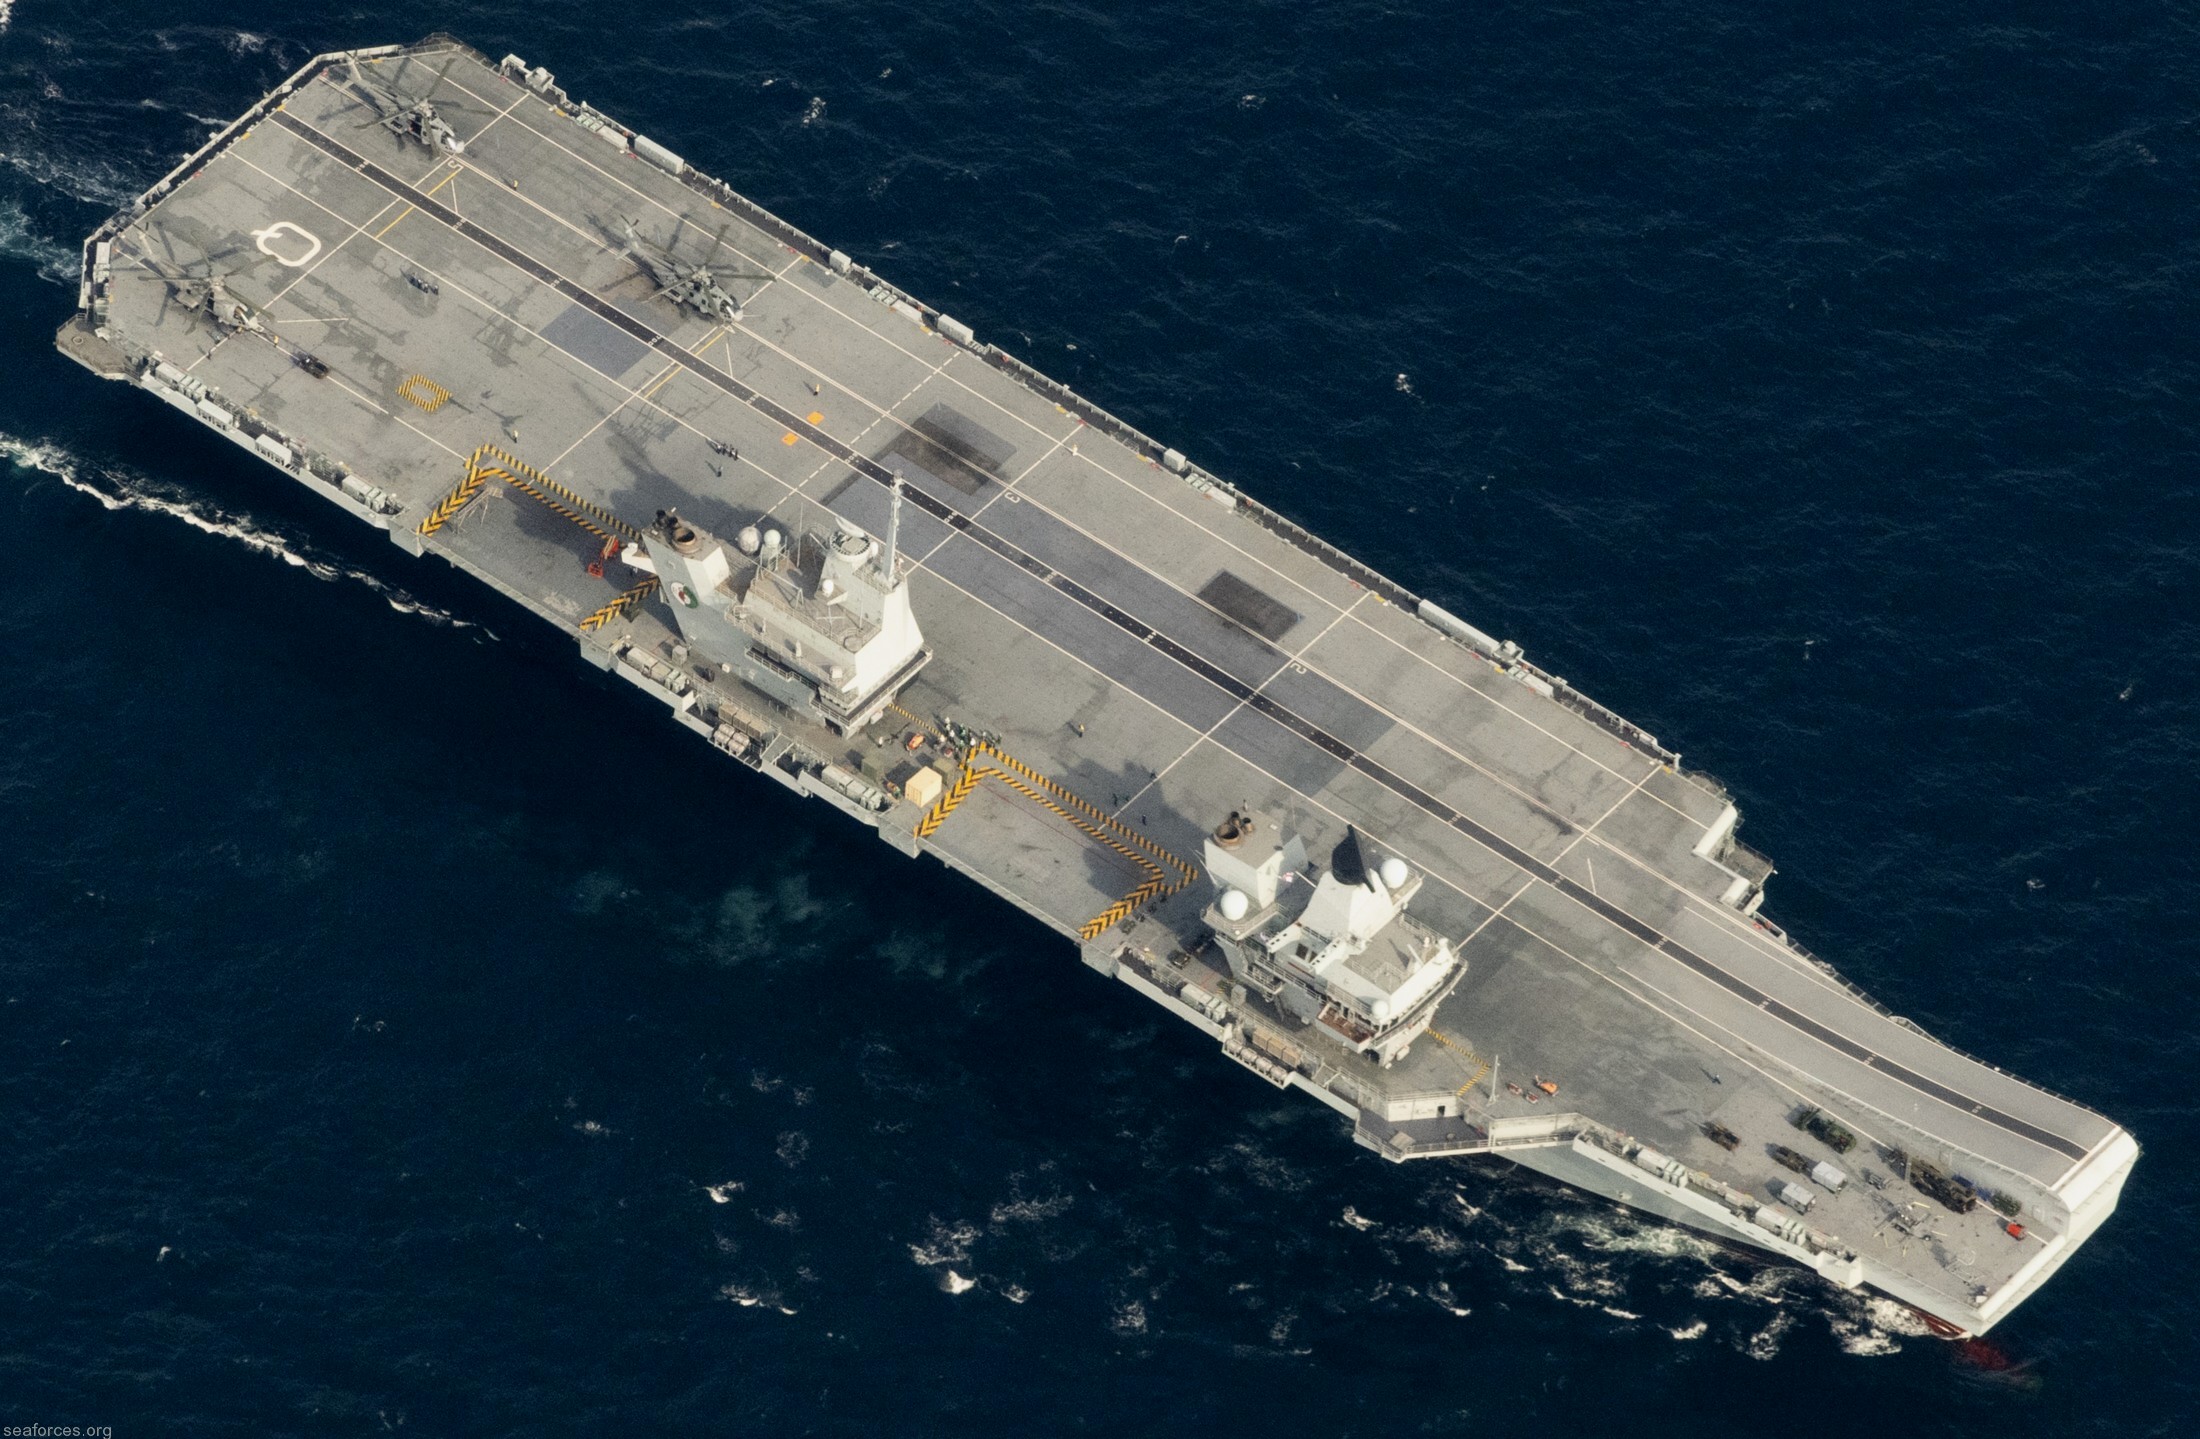
The striking features for me in photos of the flight deck are the yellow-black hazard markings around the lifts and the rectangles of different greys. The colours seem to depend on the viewing angle or maybe the main deck colour has faded with time. Many pictures show the large central area and one alongside the ski-jump as bluer and the others as a much darker grey than the general deck grey, for example here among the many excellent pictures of HMS Queen Elizabeth at SeaForces.org and at the top of this article on 'Save the Royal Navy'.
Taking advice from Jeff on Dockside, I ordered a couple of sheets of Xtradecal XPS2 simple white line transfers from Hannants. Unfortunately Hannants were out of stock of the black version so I decided to use the runway centre-line from the kit despite it being crossed by various red lines and white lines. I also used the "Q" from the kit although this much way too wide and needed to be cut and re-arranged, then over-painted by hand to cover up parts that just disintegrated on application.
I struggled at first to find suitable numbers for the landing spots - all those of around the correct size (1.8 mm high) were the wrong font. In the end I found a set of generic RAF markings from Model Art in what looks like the perfect font and are only marginally too big at 2.0 mm. I can't praise their service highly enough and would recommend them to anyone looking for decals of this type.
That left a lot of things for which I'd have to make transfers.
For the lift hazard markings, I took an overhead photo, corrected it for skew and perspective then overlaid plain black and yellow lines. At the correct scale, the lines were so narrow that, when printed, the effect was lost so I re-did it with wider bands (about 1.5x) which looked right, even though it wasn't.
I didn't want to have a physical trench for the lift edges - hard to scribe the rounded corners and these things are always oversize. Even a 0.2mm scribed line would be a ten inch gap scaled up to the real thing! Instead I decided to represent the lift edge by shading the lift edges a bit darker and having a highlight around the outside - I think this was a bit too subtle and I would have been better to just use full-strength yellow and black with a black line for the lift edges. Similarly I made the display screen decals from clippings of photos of the real thing - sadly, I don't think that whatever text they are showing will match how the aircraft are eventually arranged on deck.
Although I included pennant numbers on my transfers sheet, in the event I used some from a sheet I'd bought from Skytrex which had the correct white surround - I'd thought these would be too small but actually they were just about right.

My plan for the deck was: paint it white, apply the lift transfers, mask and airbrush black and dark blue areas then mask the lift markings and airbrush the whole deck in Vallejo neutral grey so the black and blue would subtly show through.

However the effect was too subtle and uneven so I had to varnish and re-spray the darker and bluer areas over the top. Before varnishing I also penciled in where the white lines were to be applied.
From there, things didn't go smoothly. The Humbrol acrylic spray varnish reacted with the edges of the home-made decal film or the adhesive, creating an uneven white line around the edges which I had to over-paint with fresh paint. The Xtradecal 0.5mm wide white lines seemed to kink and settle out of position at the least provocation whilst being magnetically repelled by their correct position. Their adhesive proved to have almost no stick and any areas where I'd not supplemented it with plenty of Microset just lifted off. They grey pencil marks on a grey background showed up just as well as you might expect. The runway centre-line that I'd salvaged from the kit decals was crossed by some white and red lines that needed to be disguised by hand painting and I didn't trim it quite as close as I should have done so there were some protrusions outside the bounding white lines that also had to be disguised.
Once all the longitudinal lines were on, I gave it another coat of Humbrol Acrylic spray varnish - bad move as this reacted with the home-made transfers again despite the first protective layer! The cross-deck lines went on much easier - a combination of practice and being so much shorter. The landing spot numbers stuck first time, the only difficulty being that the film was so thin they were a bit prone to bending under themselves as I applied them.
The 'Q' proved difficult too - I'd taken this from the kit decals but this was too wide - bizarely stretched out - so I cut a 1mm slice out and assembled it back together. Some of the white flaked off and some just wasn't very opaque so I hand painted over the top to blend it all in.
The first coat of matt varnish revealed a couple of new problems: despite applying over a glossy surface and using Microset, some of the decals had silvered. Also the brush-applied touch-up Vallejo neutral grey looked a markedly different colour to the original airbrushed grey under two coats of Humbrol acrylic varnish. My only solution to that was to completely re-paint the affected sections (bounded by the white deck markings) and add a final coat of AK ultraflat varnish.

As ever, I would welcome comments and advice. Especially advise on how to avoid the problems I experienced with these decals.
_off_Scotland_on_28_June_2017_(4516752).jpg/1920px-Aerial_view_of_HMS_Queen_Elizabeth_(R08)_off_Scotland_on_28_June_2017_(4516752).jpg) |
From Wikipedia Commons
|
Taking advice from Jeff on Dockside, I ordered a couple of sheets of Xtradecal XPS2 simple white line transfers from Hannants. Unfortunately Hannants were out of stock of the black version so I decided to use the runway centre-line from the kit despite it being crossed by various red lines and white lines. I also used the "Q" from the kit although this much way too wide and needed to be cut and re-arranged, then over-painted by hand to cover up parts that just disintegrated on application.
I struggled at first to find suitable numbers for the landing spots - all those of around the correct size (1.8 mm high) were the wrong font. In the end I found a set of generic RAF markings from Model Art in what looks like the perfect font and are only marginally too big at 2.0 mm. I can't praise their service highly enough and would recommend them to anyone looking for decals of this type.
That left a lot of things for which I'd have to make transfers.
For the lift hazard markings, I took an overhead photo, corrected it for skew and perspective then overlaid plain black and yellow lines. At the correct scale, the lines were so narrow that, when printed, the effect was lost so I re-did it with wider bands (about 1.5x) which looked right, even though it wasn't.
I didn't want to have a physical trench for the lift edges - hard to scribe the rounded corners and these things are always oversize. Even a 0.2mm scribed line would be a ten inch gap scaled up to the real thing! Instead I decided to represent the lift edge by shading the lift edges a bit darker and having a highlight around the outside - I think this was a bit too subtle and I would have been better to just use full-strength yellow and black with a black line for the lift edges. Similarly I made the display screen decals from clippings of photos of the real thing - sadly, I don't think that whatever text they are showing will match how the aircraft are eventually arranged on deck.
Although I included pennant numbers on my transfers sheet, in the event I used some from a sheet I'd bought from Skytrex which had the correct white surround - I'd thought these would be too small but actually they were just about right.
My plan for the deck was: paint it white, apply the lift transfers, mask and airbrush black and dark blue areas then mask the lift markings and airbrush the whole deck in Vallejo neutral grey so the black and blue would subtly show through.

However the effect was too subtle and uneven so I had to varnish and re-spray the darker and bluer areas over the top. Before varnishing I also penciled in where the white lines were to be applied.
From there, things didn't go smoothly. The Humbrol acrylic spray varnish reacted with the edges of the home-made decal film or the adhesive, creating an uneven white line around the edges which I had to over-paint with fresh paint. The Xtradecal 0.5mm wide white lines seemed to kink and settle out of position at the least provocation whilst being magnetically repelled by their correct position. Their adhesive proved to have almost no stick and any areas where I'd not supplemented it with plenty of Microset just lifted off. They grey pencil marks on a grey background showed up just as well as you might expect. The runway centre-line that I'd salvaged from the kit decals was crossed by some white and red lines that needed to be disguised by hand painting and I didn't trim it quite as close as I should have done so there were some protrusions outside the bounding white lines that also had to be disguised.
Once all the longitudinal lines were on, I gave it another coat of Humbrol Acrylic spray varnish - bad move as this reacted with the home-made transfers again despite the first protective layer! The cross-deck lines went on much easier - a combination of practice and being so much shorter. The landing spot numbers stuck first time, the only difficulty being that the film was so thin they were a bit prone to bending under themselves as I applied them.
The 'Q' proved difficult too - I'd taken this from the kit decals but this was too wide - bizarely stretched out - so I cut a 1mm slice out and assembled it back together. Some of the white flaked off and some just wasn't very opaque so I hand painted over the top to blend it all in.
The first coat of matt varnish revealed a couple of new problems: despite applying over a glossy surface and using Microset, some of the decals had silvered. Also the brush-applied touch-up Vallejo neutral grey looked a markedly different colour to the original airbrushed grey under two coats of Humbrol acrylic varnish. My only solution to that was to completely re-paint the affected sections (bounded by the white deck markings) and add a final coat of AK ultraflat varnish.

As ever, I would welcome comments and advice. Especially advise on how to avoid the problems I experienced with these decals.


Excellent work and an informative set of articles.
ReplyDeleteI've had great success with Railtec Transfers. They will make up letter/number combinations at very reasonable prices and are excellent quality. www.railtec-models.com
From gary.anson59@outlook.com
ReplyDelete